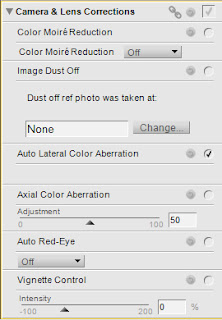
Apparently Capture NX2 automatically applies certain lens corrections, at least for Nikkor lenses. The Camera & Lens Corrections panel provides lots of options for making additional corrections, i.e.,

Lightroom also provides functionality for these corrections – you just need to know how to apply them.
Here's how:
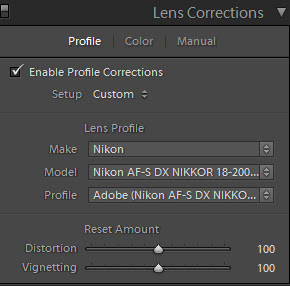
In Lightroom’s Develop module use the Lens Corrections panel to correct perspective and other lens flaws.
1. At the top of the panel, click Profile.

2. Select the Make, Model and Profile for one of your lenses, and then check Enable Profile Corrections.
3. Click Color.

4. Check Remove Chromatic Aberration. (You can mess about with the settings if you like, but that may not be necessary.)
5. From the Presets panel on the left, click +. Type a Preset Name, e.g., Nikkor 18-200, select the Settings you want to include in the new preset, e.g., Lens Profile Corrections and Chromatic Aberration, then click Create.
You can now apply the preset when you import new images (use the Apply During Import panel) or when you use the Develop module to work with individual images captured with that lens.
NX2 does a much better job of reporting camera settings at the time of capture, at least for Nikon bodies. However, given everything else that Lightroom does for me, it is all I use these days. From what I have seen of the new Advanced Healing Brush, I'm about to upgrade to Lightroom 5 for that feature alone.
Happy correcting!
